IvoryPay API Documentation
  • Authorization
    • Using your API key
  • Webhook
  • Country
  • Currency
  • Exchange Rates
  • Accept a payment
    • Initiate a transaction
    • Verify transaction
    • Pay Via Wallet Connection
  • Payment Link
    • Create a payment link
    • Update a payment link
    • Fetch payment links
    • Fetch a payment link
    • Delete a payment link
    • Initiate a payment link transaction
  • Customer
    • Add a customer
    • Update a customer
    • Fetch customers
    • Fetch a customer
    • Remove a customer
  • Swap
    • Initiate a swap
    • Fetch a swap
    • Execute a swap
  • Bank
    • Fetch banks
    • Resolve Bank Account Name
  • Bank Detail
    • Add a bank detail
    • Fetch bank details
    • Remove a bank detail
  • Payout Request
    • Create on-chain payout request
    • Create bank payout request
    • Cancel a payout request
  • Virtual Bank Account
    • Create a private customer virtual account
    • Create a business customer virtual account
    • Fetch virtual accounts
    • Simulate a transfer to a virtual account
  • Packages and SDKs
    • React Native
    • Flutter
Powered by GitBook
On this page
  1. Authorization

Using your API key

Learn how to obtain and use your API keys

PreviousAuthorizationNextWebhook

Last updated 1 year ago

To use your key, add it to the Authorization header of your request.

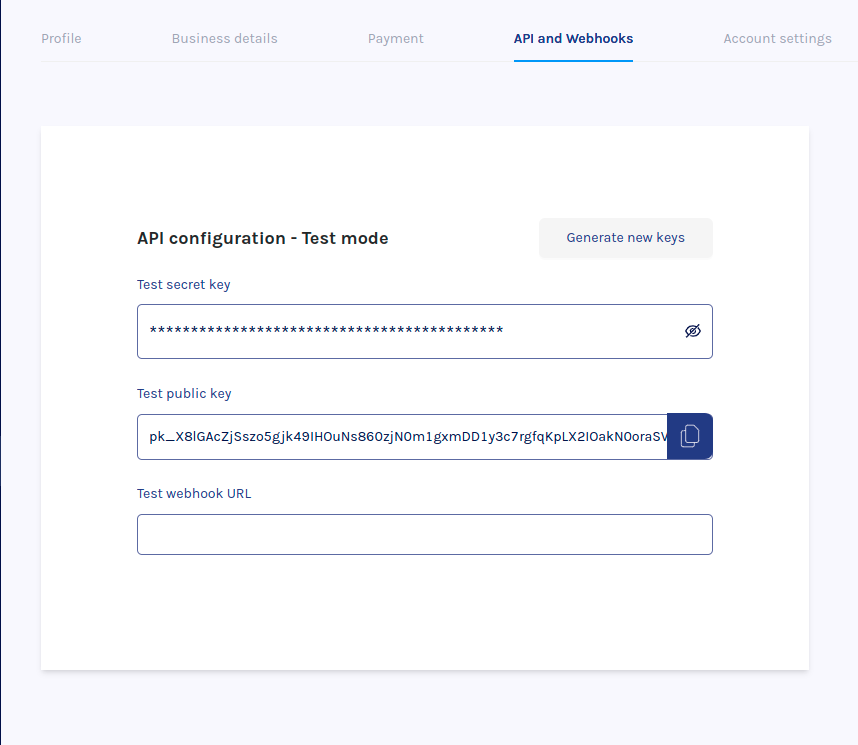
  1. Go to your business dashboard settings and find your keys.

2. Copy the key you want to use. If you have not completed the KYC process, only your test keys will be present.

3. Include the key in the Authorization header of your requests to the IvoryPay API

const url = 'https://api.ivorypay.io/v1/countries/supported';
const key = 'pk_X8lGAcZjSszo5gjk49IHOuNs860zjN0m1gxmDD1y3c7rgfqKpLX2IOakN0oraSVd';

fetch(url, {
    headers: {
        'Authorization': key,
    }
})
.then(data => {
    return data.json();
})
.then(result => {
    console.log(result);
})
.catch(e => {
    console.log(e);
});